
In the age of mobile Internet and artificial intelligence, we should follow in Google’s footsteps.
开源网站:Github
TSFOnAndroid
Apply tensorflow trained model on android
说明
本文将描述如何将一个训练好的模型植入到android设备上,并且在android设备上输入待处理数据,通过模型,获取输出数据。 通过一个例子,讲述整个移植的过程。(demo的源码访问github上了https://github.com/CrystalChen1017/TSFOnAndroid) 整体的思路如下:
使用python在PC上训练好你的模型,保存为pb文件
新建android project,把pb文件放到assets文件夹下
将tensorflow的so文件以及jar包放到libs下
加载库文件,让tensorflow在app中运行起来
准备
tensorflow的环境,参阅http://blog.csdn.net/cxq234843654/article/details/70857562
libtensorflow_inference.so
libandroid_tensorflow_inference_java.jar
如果要自己编译得到以上两个文件,需要安装bazel。参阅http://blog.csdn.net/cxq234843654/article/details/70861155 的第2步
以上两个文件通过以下两个网址进行下载: https://github.com/CrystalChen1017/TSFOnAndroid/tree/master/app/libs 或者 http://download.csdn.net/detail/cxq234843654/9833372
PC端模型的准备
这是一个很简单的模型,输入是一个数组matrix1,经过操作后,得到这个数组乘以2*matrix1。
给输入数据命名为input,在android端需要用这个input来为输入数据赋值
给输输数据命名为output,在android端需要用这个output来为获取输出的值
不能使用 tf.train.write_graph()保存模型,因为它只是保存了模型的结构,并不保存训练完毕的参数值
不能使用 tf.train.saver()保存模型,因为它只是保存了网络中的参数值,并不保存模型的结构。
graph_util.convert_variables_to_constants可以把整个sesion当作常量都保存下来,通过output_node_names参数来指定输出
tf.gfile.FastGFile(‘model/cxq.pb’, mode=’wb’)指定保存文件的路径以及读写方式
f.write(output_graph_def.SerializeToString())将固化的模型写入到文件
-- coding:utf-8 --
import tensorflow as tf
from tensorflow.python.client import graph_util
session = tf.Session()
matrix1 = tf.constant([[3., 3.]], name=’input’)
add2Mat = tf.add(matrix1, matrix1, name=’output’)
session.run(add2Mat)
output_graph_def = graph_util.convert_variables_to_constants(session, session.graph_def,output_node_names=[‘output’])
with tf.gfile.FastGFile(‘model/cxq.pb’, mode=’wb’) as f:
f.write(output_graph_def.SerializeToString())
session.close()
运行后就会在model文件夹下产生一个cxq.pb文件,现在这个文件将刚才一系列的操作固化了,因此下次需要计算变量乘2时,我们可以直接拿到pb文件,指定输入,再获取输出。
(可选的)bazel编译出so和jar文件
如果希望自己通过tensorflow的源码编译出so和jar文件,则需要通过终端进入到tensorflow的目录下,进行如下操作:
编译so库
bazel build -c opt //tensorflow/contrib/android:libtensorflow_inference.so \
– crosstool_top=//external:android/crosstool \
– host_crosstool_top=@bazel_tools//tools/cpp:toolchain \
– cpu=armeabi-v7a
编译完毕后,libtensorflow_inference.so的路径为:
/tensorflow/bazel-bin/tensorflow/contrib/android
编译jar包
bazel build //tensorflow/contrib/android:android_tensorflow_inference_java
编译完毕后,android_tensorflow_inference_java.jar的路径为:
/tensorflow/bazel-bin/tensorflow/contrib/android
android端的准备
新建一个Android Project
把刚才的pb文件存放到assets文件夹下
将libandroid_tensorflow_inference_java.jar存放到/app/libs目录下,并且右键“add as Libary”
在/app/libs下新建armeabi文件夹,并将libtensorflow_inference.so放进去
配置app:gradle以及gradle.properties
在android节点下添加soureSets,用于制定jniLibs的路径
sourceSets {
main {
jniLibs.srcDirs = [‘libs’]
}
}
在defaultConfig节点下添加
defaultConfig {
    ndk {
        abiFilters "armeabi"
    }
}
在gradle.properties中添加下面一行
android.useDeprecatedNdk=true
通过以上3步操作,tensorflow的环境已经部署好了。
模型的调用
我们先新建一个MyTSF类,在这个类里面进行模型的调用,并且获取输出
package com.learn.tsfonandroid;
import android.content.res.AssetManager;
import android.os.Trace;
import org.tensorflow.contrib.android.TensorFlowInferenceInterface;
public class MyTSF {
private static final String MODEL_FILE = “file:///android_asset/cxq.pb”; //模型存放路径
//数据的维度
private static final int HEIGHT = 1;
private static final int WIDTH = 2;

//模型中输出变量的名称
private static final String inputName = "input";
//用于存储的模型输入数据
private float[] inputs = new float[HEIGHT * WIDTH];

//模型中输出变量的名称
private static final String outputName = "output";
//用于存储模型的输出数据
private float[] outputs = new float[HEIGHT * WIDTH];


TensorFlowInferenceInterface inferenceInterface;


static {
    //加载库文件
    System.loadLibrary("tensorflow_inference");
}

MyTSF(AssetManager assetManager) {
    //接口定义
    inferenceInterface = new TensorFlowInferenceInterface(assetManager,MODEL_FILE);
}

public float[] getAddResult() {
    //为输入数据赋值
    inputs[0]=1;
    inputs[1]=3;

    //将数据feed给tensorflow
    Trace.beginSection("feed");
    inferenceInterface.feed(inputName, inputs, WIDTH, HEIGHT);
    Trace.endSection();

    //运行乘2的操作
    Trace.beginSection("run");
    String[] outputNames = new String[] {outputName};
    inferenceInterface.run(outputNames);
    Trace.endSection();

    //将输出存放到outputs中
    Trace.beginSection("fetch");
    inferenceInterface.fetch(outputName, outputs);
    Trace.endSection();

    return outputs;
}
}
在Activity中使用MyTSF类
public void click01(View v){
Log.i(TAG, “click01: “);
MyTSF mytsf=new MyTSF(getAssets());
float[] result=mytsf.getAddResult();
for (int i=0;i<result.length;i++){
Log.i(TAG, “click01: “+result[i] );
}
}
TensorFlow集成Android工程的框架
TFAndroid
TensorFlow集成Android工程的框架
框架细节,参考
TensorFlow集成Android工程的框架
SpikeKing 2017.09.21
在Android工程中,集成TensorFlow模型。运行TensorFlow的默认Android工程,请参考。
Android源码:https://github.com/SpikeKing/TFAndroid/tree/master
库及模型的大小
libtensorflow_inference.so 10.2 M
libandroid_tensorflow_inference_java.jar 27 KB
optimized_tfdroid.pb 291 B
如果将so转换为jar库,参考,则TF的so由10.2M缩小至4.1M。

TF Android
TensorFlow
TF模型源码:
https://github.com/SpikeKing/MachineLearningTutorial/blob/master/tests/android_test.py
创建TensorFlow模型,简单的y=WX+b,存储图信息write_graph,存储参数信息saver.save。输入数据placeholder是I,输出数据是O。
import tensorflow as tf
I = tf.placeholder(tf.float32, shape=[None, 3], name=’I’) # input
W = tf.Variable(tf.zeros(shape=[3, 2]), dtype=tf.float32, name=’W’) # weights
b = tf.Variable(tf.zeros(shape=[2]), dtype=tf.float32, name=’b’) # biases
O = tf.nn.relu(tf.matmul(I, W) + b, name=’O’) # activation / output
saver = tf.train.Saver()
init_op = tf.global_variables_initializer()
with tf.Session() as sess:
sess.run(init_op)
tf.train.write_graph(sess.graph_def, './data/android/', 'tfdroid.pbtxt')  # 存储TensorFlow的图

# 训练数据,本例直接赋值
sess.run(tf.assign(W, [[1, 2], [4, 5], [7, 8]]))
sess.run(tf.assign(b, [1, 1]))

# 存储checkpoint文件,即参数信息
saver.save(sess, './data/android/tfdroid.ckpt')
创建Freeze的图,将图结构与参数组合在一起,生成模型,参考。
def gnr_freeze_graph(input_graph, input_saver, input_binary, input_checkpoint,
output_node_names, output_graph, clear_devices):
“””
将输入图与参数结合在一起
:param input_graph: 输入图
:param input_saver: Saver解析器
:param input_binary: 输入图的格式,false是文本,true是二进制
:param input_checkpoint: checkpoint,检查点文件

:param output_node_names: 输出节点名称
:param output_graph: 保存输出文件
:param clear_devices: 清除训练设备
:return: NULL
"""
restore_op_name = "save/restore_all"
filename_tensor_name = "save/Const:0"

freeze_graph.freeze_graph(
    input_graph=input_graph,  # 输入图
    input_saver=input_saver,  # Saver解析器
    input_binary=input_binary,  # 输入图的格式,false是文本,true是二进制
    input_checkpoint=input_checkpoint,  # checkpoint,检查点文件
    output_node_names=output_node_names,  # 输出节点名称
    restore_op_name=restore_op_name,  # 从模型恢复节点的名字
    filename_tensor_name=filename_tensor_name,  # tensor名称
    output_graph=output_graph,  # 保存输出文件
    clear_devices=clear_devices,  # 清除训练设备
    initializer_nodes="")  # 初始化节点
优化模型,剪切节点,模型只保留输入输出的参数。
def gnr_optimize_graph(graph_path, optimized_graph_path):
“””
优化图
:param graph_path: 原始图
:param optimized_graph_path: 优化的图
:return: NULL
“””
input_graph_def = tf.GraphDef() # 读取原始图
with tf.gfile.Open(graph_path, “r”) as f:
data = f.read()
input_graph_def.ParseFromString(data)
# 设置输入输出节点,剪切分支,大约节省1/4
output_graph_def = optimize_for_inference_lib.optimize_for_inference(
    input_graph_def,
    ["I"],  # an array of the input node(s)
    ["O"],  # an array of output nodes
    tf.float32.as_datatype_enum)

# 存储优化的图
f = tf.gfile.FastGFile(optimized_graph_path, "w")
f.write(output_graph_def.SerializeToString())
执行函数,生成模型,frozen_tfdroid.pb和optimized_tfdroid.pb。
if name == “main“:
input_graph_path = MODEL_FOLDER + MODEL_NAME + ‘.pbtxt’ # 输入图
checkpoint_path = MODEL_FOLDER + MODEL_NAME + ‘.ckpt’ # 输入参数
output_path = MODEL_FOLDER + ‘frozen_’ + MODEL_NAME + ‘.pb’ # Freeze模型
gnr_freeze_graph(input_graph=input_graph_path, input_saver="",
                 input_binary=False, input_checkpoint=checkpoint_path,
                 output_node_names="O", output_graph=output_path, clear_devices=True)

optimized_output_graph = MODEL_FOLDER + 'optimized_' + MODEL_NAME + '.pb'

gnr_optimize_graph(output_path, optimized_output_graph)
Android
编译Android的库,参考,或者,直接在Nightly中下载,参考,archive.zip,大约158M。
创建Android工程,添加app/libs/中添加库文件。
armeabi-v7a/libtensorflow_inference.so
libandroid_tensorflow_inference_java.jar
在build.gradle中,添加
android {
sourceSets {
main {
jniLibs.srcDirs = [‘libs’]
}
}
}
在app/src/main/assets中,添加模型optimized_tfdroid.pb文件。
在MainActivity中,添加so库。
static {
System.loadLibrary(“tensorflow_inference”);
}
模型文件在assets中,TF的核心接口类TensorFlowInferenceInterface。
private static final String MODEL_FILE = “file:///android_asset/optimized_tfdroid.pb”;
private TensorFlowInferenceInterface mInferenceInterface;
初始模型文件
mInferenceInterface = new TensorFlowInferenceInterface();
mInferenceInterface.initializeTensorFlow(getAssets(), MODEL_FILE);
模型Feed数据,输入点名称是INPUT_NODE,输入结构INPUT_SIZE,输入数据inputFloats。
float[] inputFloats = {num1, num2, num3};
mInferenceInterface.fillNodeFloat(INPUT_NODE, INPUT_SIZE, inputFloats);
模型执行文件,输出点名称是OUTPUT_NODE,即”O”
mInferenceInterface.runInference(new String[]{OUTPUT_NODE});
输出数据结构
float[] resu = {0, 0};
mInferenceInterface.readNodeFloat(OUTPUT_NODE, resu);
最后,在layout中创建GUI布局。
效果

TensorFlow集成至春雨医生

That’s all! Enjoy it!
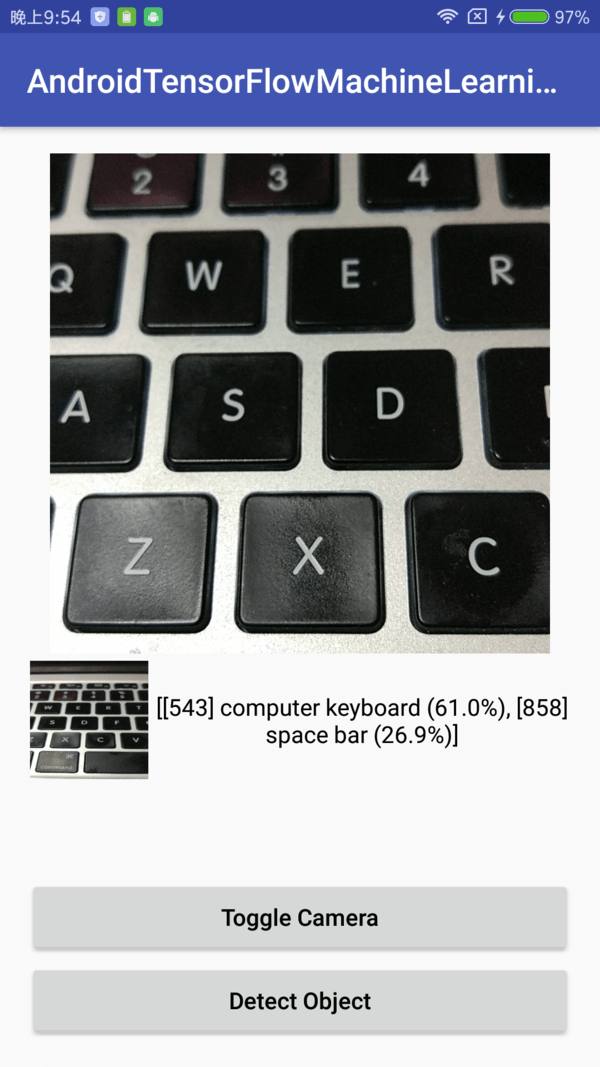
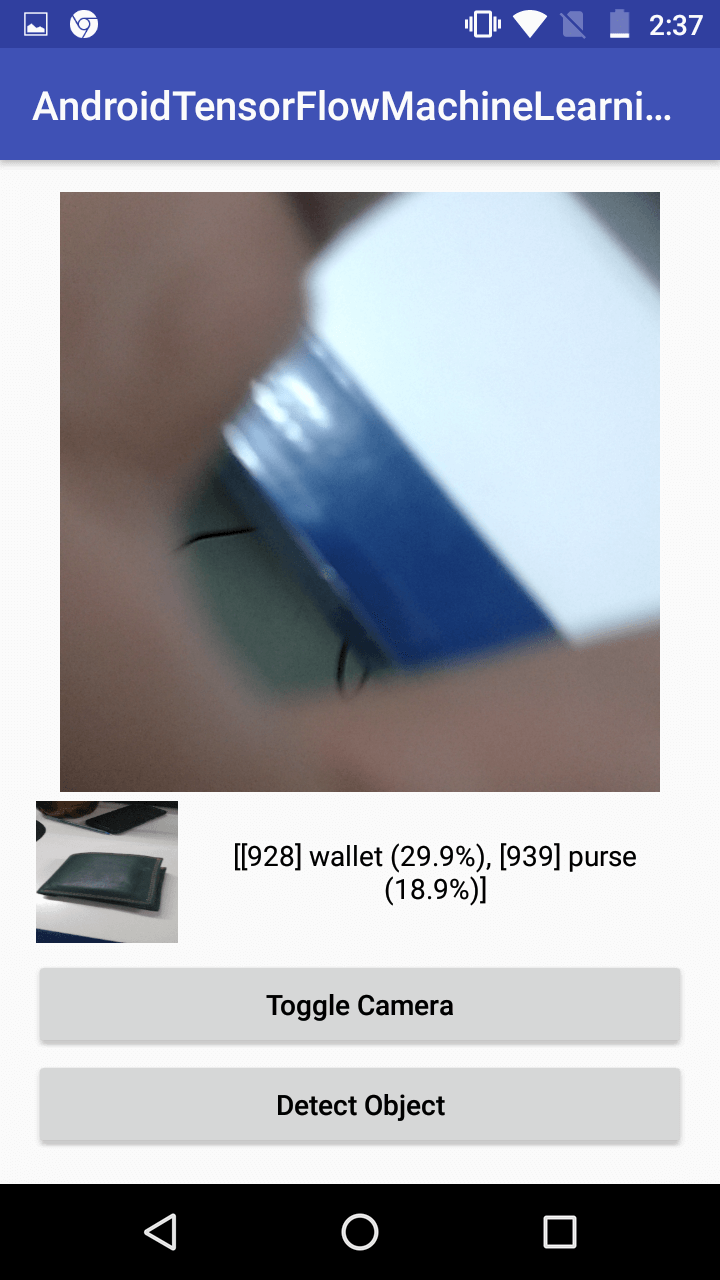
AndroidTensorFlowMachineLearningExample
Android TensorFlow MachineLearning Example (Building TensorFlow for Android)

About Android TensorFlow Machine Learning Example
This is an example project for integrating TensorFlow into Android application
How to build TensorFlow project to use with Android project.
How to build TensorFlow library(.so file and jar file) to use with Android Application.
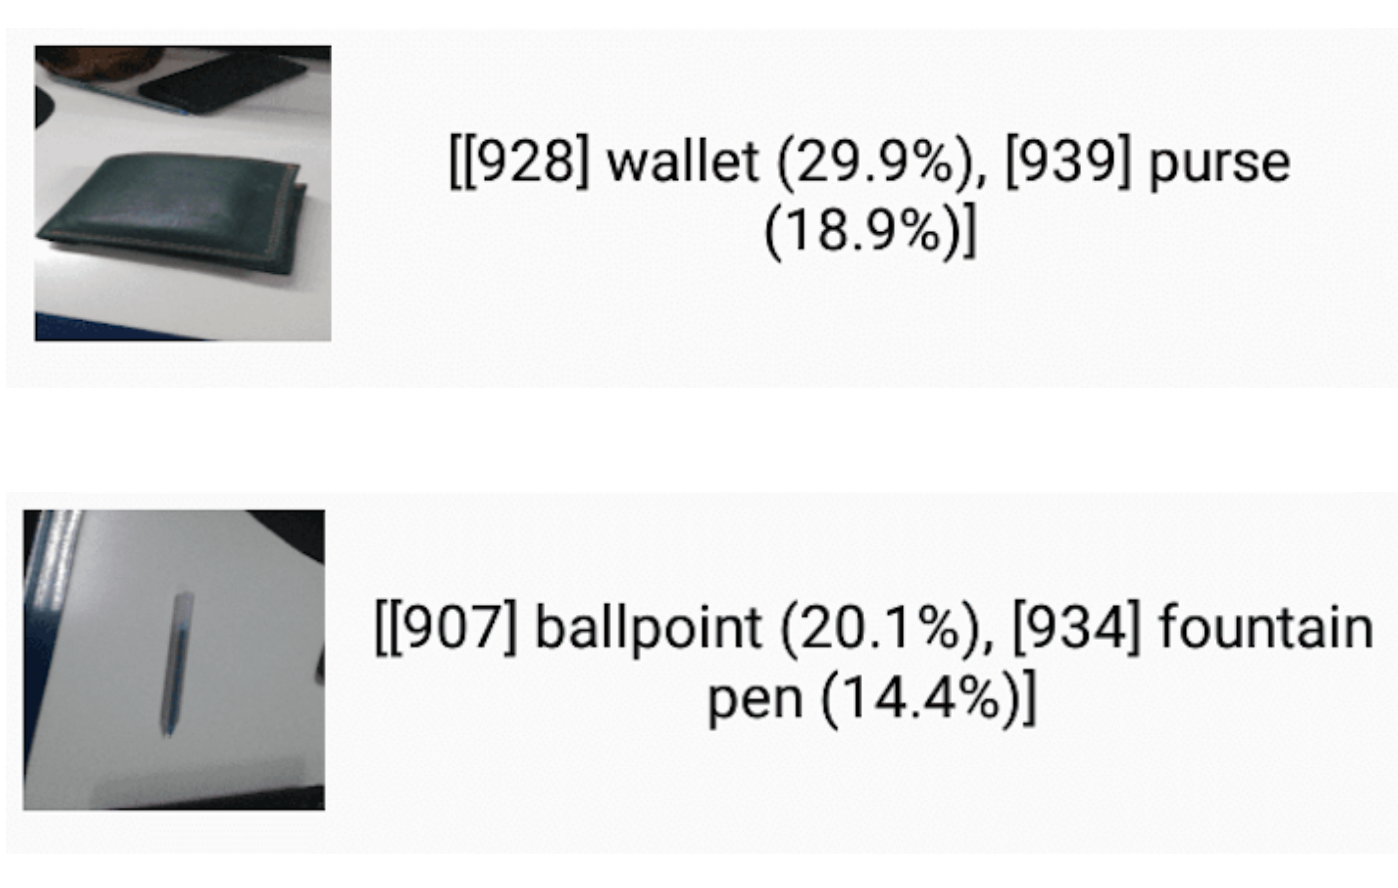
This project include an example for object detection for an image taken from camera using TensorFlow library.
Read this article. It describes everything about building TensorFlow for Android.

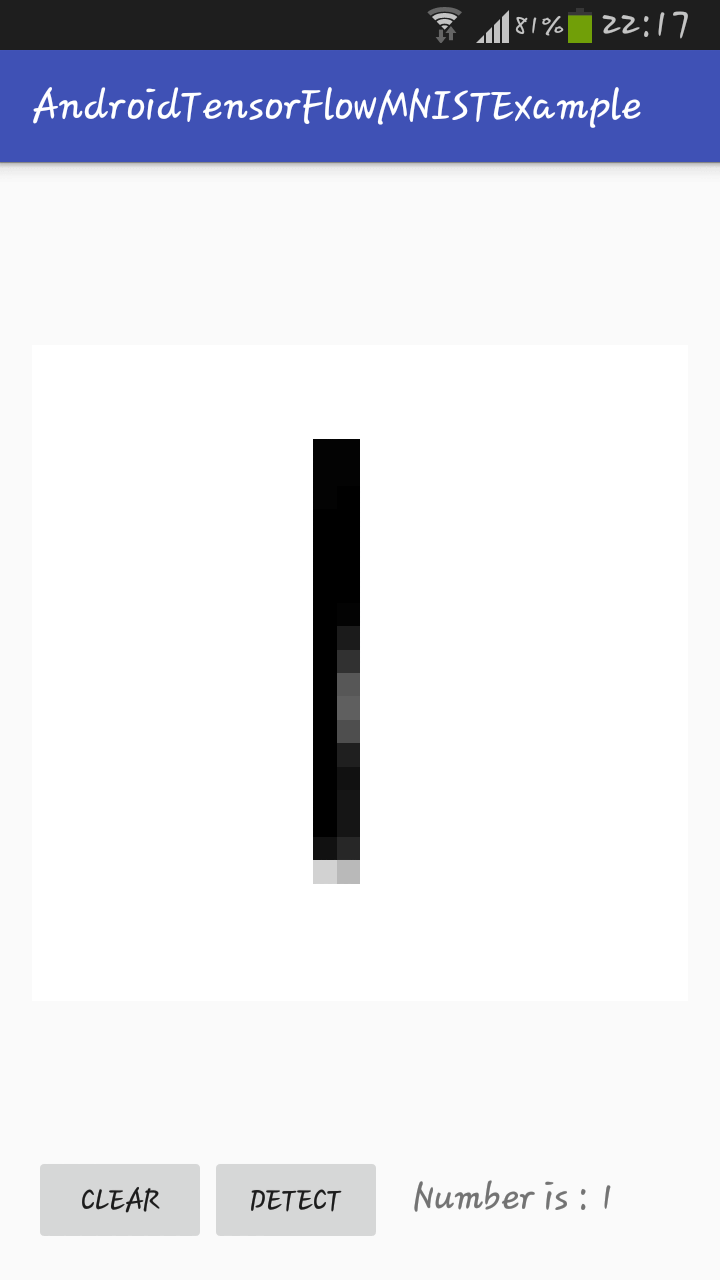
Android TensorFlow MachineLearning MNIST Example (Building Model with TensorFlow for Android)
About Android TensorFlow Machine Learning MNIST Example
This is an example project for creating machine learning model for MNIST to detect hand written digits.
Check this project for building tensorFlow for Android.
Now, there is no need to build the library as the it is now available through maven. Check this pull request.
Read this article. It describes everything about creating custom model for Android using TensorFlow.
How to train model?
To create model by yourself, install TensorFlow and run python scripts like
$ python mnist.py
HyperLPR
基于深度学习高性能中文车牌识别 High Performance Chinese License Plate Recognition Framework. http://www.zeusee.com
High Accuracy Chinese License Plate Recognition Framework
介绍
This research aims at simply developping plate recognition project based on deep learning methods, with low complexity and high speed. This project has been used by some commercial corporations. Free and open source, deploying by Zeusee. this pipline also can apply to other countries license plate by training
HyperLPR是一个使用深度学习针对对中文车牌识别的实现,与其他开源的中文车牌识别框架相比,它的检测速度和鲁棒性和多场景的适应性都要好于其他的开源框架。
相关资源
在线测试地址(已失效)。
相关技术博客(技术文章会在接下来的几个月的时间内连续更新)。
带UI界面的工程(感谢群内小伙伴的工作)。
端到端(多标签分类)训练代码(感谢群内小伙伴的工作)。
端到端(CTC)训练代码(感谢群内小伙伴工作)。
训练代码和字符分割介绍
IOS版本 xiaojun123456贡献
更新
增加了端到端模型的cpp实现,识别速度比分割快30%(Linux)(2018.1.31)
增加字符分割训练代码和字符分割介绍(2018.1.)
更新了Android实现,大幅提高准确率和速度 (骁龙835 (720x1280) ~50ms )(2017.12.27)
添加了IOS版本的实现(感谢xiaojun123456的工作)
添加端到端的序列识别模型识别率大幅度提升,使得无需分割字符即可识别,识别速度提高20% (2017.11.17)
新增的端到端模型可以识别新能源车牌、教练车牌、白色警用车牌、武警车牌 (2017.11.17)
更新Windows版本的Visual Studio 2015 工程(2017.11.15)
增加cpp版本,目前仅支持标准蓝牌(需要依赖OpenCV 3.3) (2017.10.28)
TODO
提供字符字符识别的训练代码
改进精定位方法
C++版的端到端识别模型
特性
速度快 720p ,单核 Intel 2.2G CPU (macbook Pro 2015)平均识别时间低于100ms
基于端到端的车牌识别无需进行字符分割
识别率高,仅仅针对车牌ROI在EasyPR数据集上,0-error达到 95.2%, 1-error识别率达到 97.4% (指在定位成功后的车牌识别率)
轻量 总代码量不超1k行
注意事项:
Win工程中若需要使用静态库,需单独编译
本项目的C++实现和Python实现无任何关联,都为单独实现
在编译C++工程的时候必须要使用OpenCV 3.3(DNN 库),否则无法编译
Python 依赖
Keras (>2.0.0)
Theano(>0.9) or Tensorflow(>1.1.x)
Numpy (>1.10)
Scipy (0.19.1)
OpenCV(>3.0)
Scikit-image (0.13.0)
PIL
CPP 依赖
Opencv 3.3
简单使用方式
from hyperlpr import pipline as pp
import cv2
image = cv2.imread(“filename”)
image,res = pp.SimpleRecognizePlate(image)
print(res)
Linux/Mac 编译
仅需要的依赖OpenCV 3.3 (需要DNN框架)
cd cpp_implementation
mkdir build
cd build
cmake ../
sudo make -j
CPP demo
#include “../include/Pipeline.h”
int main(){
pr::PipelinePR prc(“model/cascade.xml”,
“model/HorizonalFinemapping.prototxt”,”model/HorizonalFinemapping.caffemodel”,
“model/Segmentation.prototxt”,”model/Segmentation.caffemodel”,
“model/CharacterRecognization.prototxt”,”model/CharacterRecognization.caffemodel”,
“model/SegmentationFree.prototxt”,”model/SegmentationFree.caffemodel”
);
//定义模型文件
cv::Mat image = cv::imread("/Users/yujinke/ClionProjects/cpp_ocr_demo/test.png");
std::vector<pr::PlateInfo> res = prc.RunPiplineAsImage(image,pr::SEGMENTATION_FREE_METHOD);
//使用端到端模型模型进行识别 识别结果将会保存在res里面
for(auto st:res) {
    if(st.confidence>0.75) {
        std::cout << st.getPlateName() << " " << st.confidence << std::endl;
      //输出识别结果 、识别置信度
        cv::Rect region = st.getPlateRect();
      //获取车牌位置
cv::rectangle(image,cv::Point(region.x,region.y),cv::Point(region.x+region.width,region.y+region.height),cv::Scalar(255,255,0),2);
//画出车牌位置
    }
}

cv::imshow("image",image);
cv::waitKey(0);
return 0 ;
}
可识别和待支持的车牌的类型
单行蓝牌
单行黄牌
新能源车牌
白色警用车牌
使馆/港澳车牌
教练车牌
武警车牌
民航车牌
双层黄牌
双层武警
双层军牌
双层农用车牌
双层个性化车牌
Note:由于训练的时候样本存在一些不均衡的问题,一些特殊车牌存在一定识别率低下的问题,如(使馆/港澳车牌),会在后续的版本进行改进。
测试样例


Android示例

识别测试APP
体验 Android APP:https://fir.im/HyperLPR (根据图片尺寸调整程序中的尺度,提高准确率)
感谢 sundyCoder Android 版本完善
hyperlpr4Android
hyperlpr4Android
热烈欢迎感兴趣的朋友,一起加入Android平台的研发。
参见 https://github.com/zeusees/HyperLPR
效果如下:

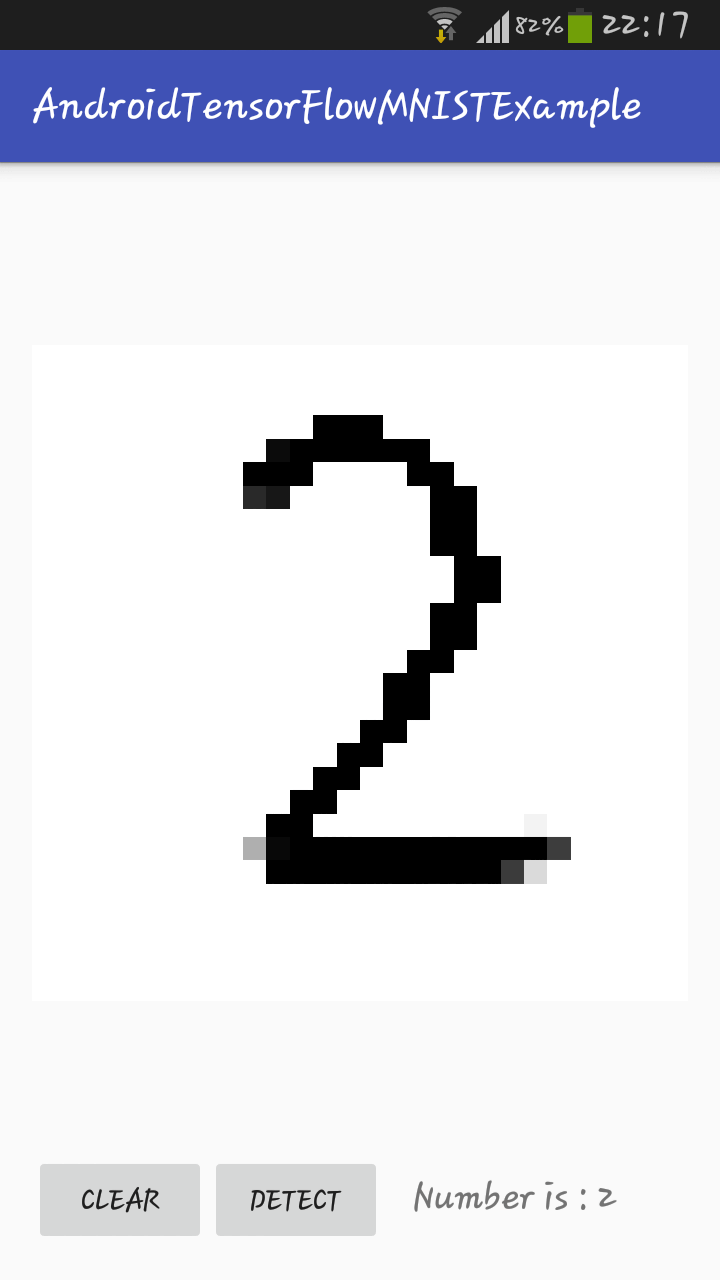
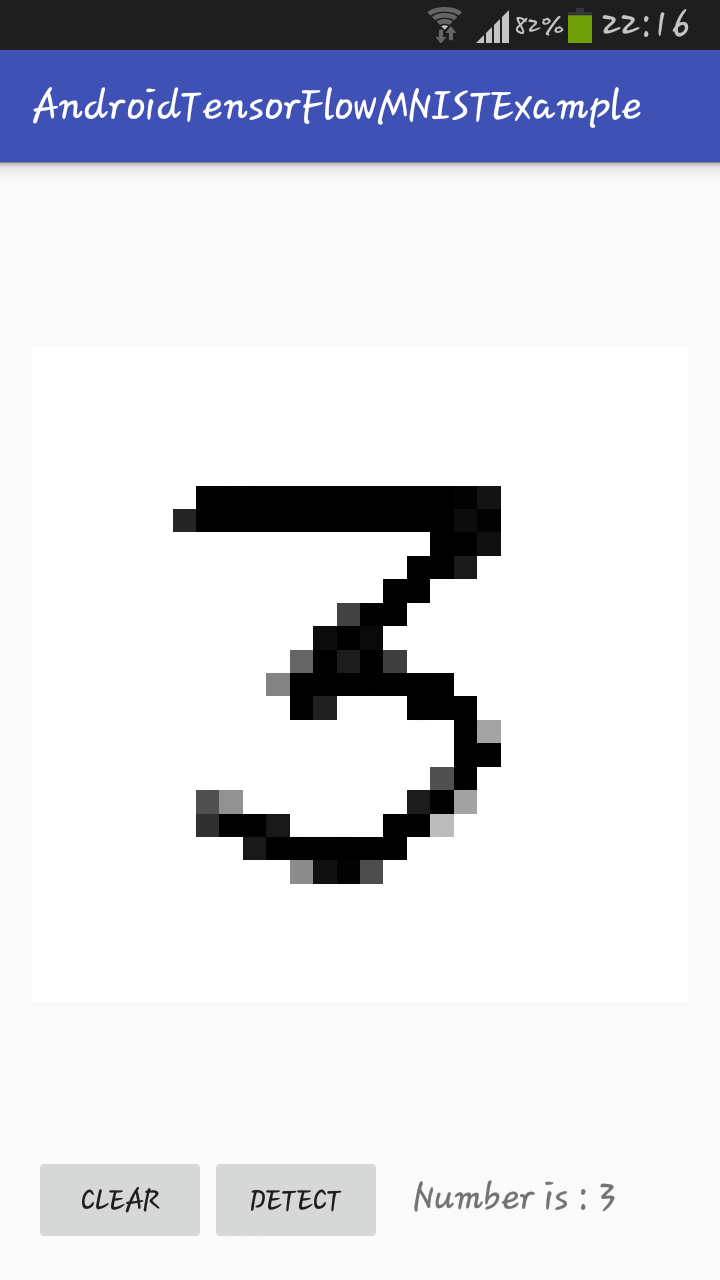
mnist-android-tensorflow
MNIST on Android with TensorFlow
This work was featured on a video from Siraj Raval!
Check the video demo here.

Beautiful art work, right? I know.
Handwritten digits classification from MNIST on Android with TensorFlow.
If you want to make your own version of this app or want to know how to save your model and export it for Android or other devices check the very simple tutorial below.
The UI and expert-graph.pb model were taken from: https://github.com/miyosuda/TensorFlowAndroidMNIST, so thank you miyousuda.
The TensorFlow jar and so armeabi-v7a were taken from: https://github.com/MindorksOpenSource/AndroidTensorFlowMNISTExample, so thank you MindorksOpenSource.
The Tensorflow so of x86 was taken from: https://github.com/cesardelgadof/TensorFlowAndroidMNIST, so thank you cesardelgadof.
How to run this?
Just open this project with Android Studio and is ready to run, this will work with x86 and armeabi-v7a architectures.
How to export my model?
A full example can be seen here
1.Train your model
2.Keep an in memory copy of eveything your model learned (like biases and weights) Example: _w = sess.eval(w), where w was learned from training.
3.Rewrite your model changing the variables for constants with value = in memory copy of learned variables. Example: w_save = tf.constant(_w)
Also make sure to put names in the input and output of the model, this will be needed for the model later. Example:
x = tf.placeholder(tf.float32, [None, 1000], name=’input’)
y = tf.nn.softmax(tf.matmul(x, w_save) + b_save), name=’output’)
4.Export your model with:
tf.train.write_graph(
How to run my model with Android?
You basically need two things:
The TensorFlow jar
Move it to the libs folder, right click and add as library.
The TensorFlow so file for the desired architecture:
x86
armeabi-v7a
Creat the jniLibs/x86 folder or the jniLibs/armeabi-v7a folder at the main folder.
Move it to app/src/main/jniLibs/x86/libtensorflow_inference.so or app/src/jniLibs/armeabi-v7a/libtensorflow_inference.so
If you want to generate these files yourself, here is a nice tutorial of how to do it.
Interacting with TensorFlow
To interact with TensorFlow you will need an instance of TensorFlowInferenceInterface, you can see more details about it here
Thank you, have fun!
android-yolo
Real-time object detection on Android using the YOLO network with TensorFlow
TensorFlow YOLO object detection on Android
android-yolo is the first implementation of YOLO for TensorFlow on an Android device. It is compatible with Android Studio and usable out of the box. It can detect the 20 classes of objects in the Pascal VOC dataset: aeroplane, bicycle, bird, boat, bottle, bus, car, cat, chair, cow, dining table, dog, horse, motorbike, person, potted plant, sheep, sofa, train and tv/monitor. The network only outputs one predicted bounding box at a time for now. The code can and will be extended in the future to output several predictions.
To use this demo first clone the repository. Download the TensorFlow YOLO model and put it in android-yolo/app/src/main/assets. Then open the project on Android Studio. Once the project is open you can run the project on your Android device using the Run ‘app’ command and selecting your device.
NEW: The standalone APK has been released and you can find it here. Just open your browser on your Android device and download the APK file. When the file has been downloaded it should begin installing on your device after you grant the required permissions.
GPUs are not currently supported by TensorFlow on Android. If you have a decent Android device you will have around two frames per second of processed images.
Here is a video showing a small demo of the app.
Nataniel Ruiz
School of Interactive Computing
Georgia Institute of Technology
Credits: App launch icon made by Freepik from Flaticon is licensed by Creative Commons BY 3.0.
Disclaimer: The app is hardcoded for 20 classes and for the tiny-yolo network final output layer. You can check the following code if you want to change this:
The code describes the interpretation of the output.
The code for the network inference pass is written in C++ and the output is passed to Java. The output of the network is in the form of a String which is converted to a StringTokenizer and is then converted into an array of Floats in line 87 of TensorflowClassifier.java
You can work from there and read the papers to transform the new yolo model output into something that makes sense. (I did it only for one bounding box and also obtained the confidence of this bounding box). This part of the code is commented by me so you can understand what I did. Also read the paper here: https://arxiv.org/abs/1506.02640
yolo-tiny-v1-mobile
Yolo for Android and iOS - Mobile Deep Learning Object Detection in Realtime
olo for Android and iOS - Mobile Deep Learning Object Detection in Realtime
This repository contains an implementation of the (Tiny) Yolo V1 objector detector for both Android and iOS.
Yolo?
This Ted Talk by the creator of Yolo itself gives a nice high-level overview: Joseph Redmon - How a computer learns to recognize objects instantly.
You should also check out his CV. Really, do it ;)
The notebooks provided in this repository contain some more references regarding Yolo.
Motivation
This project came to be because I wanted to apply the knowledge I have gained from various Deep Learning related courses over the year in a practical project and was searching for a workflow which supports:
Model Exploration/Implementation
Model Training/Validation
Model Optimization
Deployment on iOS and Android
Features
Realtime object detection
Support for Android and iOS
“Live” Switching between Portrait and Landscape Orientation
Prerequisites
Jupyter Notebooks
The notebooks should be compatible with Python 3.5, Keras 2, Tensorflow 1.2.x. You can find the complete list of dependencies in environment.yml
Android
The Android app is written in Kotlin and should work with any Android Studio Version from 3.x onwards.
iOS
Run pod install to install the required dependencies via Cocoapods. The iOS app is written in Swift 3 and Object C++ and should work with a recent version of Xcode.
Build Process
Create notebooks/tf-exports folder
The notebooks will use this folder to export models to.Follow the instructions in notebooks/01_exploration.ipynb to create a keras model with tensorflow backend
This notebook documents the process of implementing Yolo in Keras, converting the pretrained darknet weights for keras and converting them to a format compatible with the tensorflow backend.Follow the instructions in notebooks/02_export_to_tf.ipynb to export an optimized tensorflow model
This notebook shows how to export the keras model to tensorflow and how to optimize it for inference. The resulting model files contain the tensorflow model that will be loaded by the mobile apps.Include model file in mobile projects
iOS: Open the project in XCode and drag and drop frozen_yolo.pb into XCode.
Android: Create a folder named mobile/Android/YoloTinyV1Tensorflow/app/src/main/assets and copy optimized_yolo.pb into it.
Note: You could try to use optimized_yolo.pb with iOS as well. It didn’t work with the version of tensorflow I was using though.
Improvements
Overlapping Detection Boxes
The mobile apps do not use Non-Maximum Suppression yet. This means that the apps will display multiple boxes for the same object. I will add this feature to the apps soon. Check out notebooks/01_exploration.ipynb if you’re interested in how this works, or you want to implement it youself.
Performance
Performance on Android and iOS is suboptimal. There are some opportunities to improve performance (e.g. weight quantization). Will definitely look into this some more.
Camera Switching
Both apps only use the back camera. A camera switcher would be a nice improvement.
TensorFlowAndroidDemo
TensorFlow Android stand-alone demo
TensorFlow Android stand-alone demo
Android demo source files extracted from original TensorFlow source. (TensorFlow r0.10)
To build this demo, you don’t need to prepare build environment with Bazel, and it only requires AndroidStudio.
If you would like to build jni codes, only NDK is requied to build it.
How to build jni codes
First install NDK, and set path for NDK tools, and then type commands below to create .so file.
$ cd jni-build
$ make
$ make install
Tensorflow MNIST demo on Android
TensorFlowAndroidMNIST - Android MNIST demo with TensorFlow
This is a demo app for Android with Tensorflow to detect handwritten digits.
This Android demo is based on Tensorflow tutorial.
MNIST For ML Beginners https://www.tensorflow.org/versions/r0.10/tutorials/mnist/beginners/index.html
Deep MNIST for Experts https://www.tensorflow.org/versions/r0.10/tutorials/mnist/pros/index.html
How to train model.
Training scripts for neural network model are located at
https://github.com/miyosuda/TensorFlowAndroidMNIST/tree/master/trainer-script
To create model by yourself, install Tensorflow and run python scripts like
$ python beginner.py
or
$ python expert.py
and locate exported .pb file to assets dir.
To export training model, I added some modification to original tutorial scripts.
Now Tensorflow cannot export network graph and trained network weight Variable at the same time, so we need to create another graph to export and convert Variable into constants.
After training is finished, converted trained Variable to numpy ndarray.
_W = W.eval(sess)
_b = b.eval(sess)
and then convert them into constant and re-create graph for exporting.
W_2 = tf.constant(_W, name=”constant_W”)
b_2 = tf.constant(_b, name=”constant_b”)
And then use tf.train.write_graph to export graph with trained weights.
How to build JNI codes
Native .so files are already built in this project, but if you would like to build it by yourself, please install and setup NDK.
First download, extract and place Android NDK.
http://developer.android.com/intl/ja/ndk/downloads/index.html
And then update your PATH environment variable. For example,
export NDK_HOME=”/Users/[your-username]/Development/android/android-ndk-r11b”
export PATH=$PATH:$NDK_HOME
And build .so file in jni-build dir.
$ cd jni-build
$ make
and copy .so file into app/src/main/jniLibs/armeabi-v7a/ with
$ make install
(Unlike original Android demo in Tensorflow, you don’t need to install bazel to build this demo.
Tensorflow library files (.a files) and header files are extracted from original Tensorflow Android demo r0.10.
Human-Activity-Recognition-using-CNN
CNN for Human Activity Recognition
Python notebook for blog post Implementing a CNN for Human Activity Recognition in Tensorflow.
Tools Required
Python 2.7 is used during development and following libraries are required to run the code provided in the notebook:
Tensorflow
Numpy
Matplotlib
Pandas
Dataset
The WISDM Actitracker dataset used for model training, can be downloaded from the following link
Related Problem
User identification from walking activity. Accelerometer dataset from 22 indivduals can be downloaded from the following link
A_Guide_to_Running_Tensorflow_Models_on_Android
This is the code for”A Guide to Running Tensorflow Models on Android” By SIraj Raval on Youtube
Overview
This is the code for this video on Youtube by Siraj Raval.

Handwritten digits classification from MNIST on Android with TensorFlow.
If you want to make your own version of this app or want to knowhow to save your model and export it for Android or other devices check the very simple tutorial below. The UI and expert-graph.pb model were taken from: https://github.com/miyosuda/TensorFlowAndroidMNIST, so thank you miyousuda.
Dependencies
All included
Usage
Just open this project with Android Studio and is ready to run, this will work with x86 and armeabi-v7a architectures.
How to export my model?
A full example can be seen here
Train your model
Keep an in memory copy of eveything your model learned (like biases and weights) Example: _w = sess.eval(w), where w was learned from training.
Rewrite your model changing the variables for constants with value = in memory copy of learned variables. Example: w_save = tf.constant(_w)
Also make sure to put names in the input and output of the model, this will be needed for the model later. Example:
x = tf.placeholder(tf.float32, [None, 1000], name=’input’)
y = tf.nn.softmax(tf.matmul(x, w_save) + b_save), name=’output’)
Export your model with:
tf.train.write_graph(
How to run my model with Android?
You need tensorflow.aar, which can be downloaded from the nightly build artifact of TensorFlow CI, here we use the #124 build.
Interacting with TensorFlow
To interact with TensorFlow you will need an instance of TensorFlowInferenceInterface, you can see more details about it here
TensorFlow-on-Android-for-Human-Activity-Recognition-with-LSTMs
iPython notebook and Android app that shows how to build LSTM model in TensorFlow and deploy it on Android
TensorFlow on Android for Human Activity Recognition with LSTMs
Full explanation can be found in this blog post. The source code is compatible with TensorFlow 1.1
Credit-Card-Fraud-Detection-using-Autoencoders-in-Keras
Credit Card Fraud Detection using Autoencoders in Keras
Full explanation can be found in this blog post. The source code is compatible with TensorFlow 1.1 and Keras 2.0
Real-Time Semantic Segmentation in Mobile device
Real-Time Semantic Segmentation in Mobile device
This project is an example project of semantic segmentation for mobile real-time app.
The architecture is inspired by MobileNets and U-Net.
LFW, Labeled Faces in the Wild, is used as a Dataset.
The goal of this project is to detect hair segments with reasonable accuracy and speed in mobile device. Currently, it achieves 0.89 IoU.
About speed vs accuracy, more details are available at my post.

Example application
iOS
Android (TODO)
Requirements
Keras 2
TensorFlow as a backend of Keras and for Android app.
CoreML for iOS app.
About Model
At this time, there is only one model in this repository, MobileUNet.py. As a typical U-Net architecture, it has encoder and decoder parts, which consist of depthwise conv blocks proposed by MobileNets.
Input image is encoded to 1/32 size, and then decoded to 1/2. Finally, it scores the results and make it to original size.
Beside the U-Net like model, PSPNet like model was also tried. But it did not make a good result. Probably, global context does not have so much importance in the problem of hair recognition.
Steps to training
Data Preparation
Data is available at LFW. To get mask images, refer issue #11 for more. After you got images and masks, put the images of faces and masks as shown below.
data/
raw/
images/
0001.jpg
0002.jpg
masks/
0001.ppm
0002.ppm
Then, convert it to numpy binary format for portability.
python data.py –img_size=128
Data augmentation will be done on the fly during training phase. I used rotation, shear ,zoom and horizontal flip.
Training
This repository contains three kinds of training scripts, transfer learning, fine tuning and full training. MobileNets is so compact that it’s possible to try full training in a short time.
Full training
python train_full.py \
–img_file=/path/to/images.npy \
–mask_file=/path/to/masks.npy
Dice coefficient is used as a loss function. Some other metrics are used such as precision, recall and binary cross entropy. Loss can be decreased soon smoothly even with high learning rate.
I also tried adding aux loss by using the segment of face part. Though, still I have not fully examined the effect of it, there maybe a little improvement of accuracy without dropping inference speed.
Converting
As the purpose of this project is to make model run in mobile device, this repository contains some scripts to convert models for iOS and Android.
coreml-converter.py
It converts trained hdf5 model to CoreML model for iOS app.
coreml-converter-bench.py
It generates non-trained CoreML model. It’s useful to measure the inference speed in iOS device.
tf-converter.py
It converts trained hdf5 model to protocol buffer format for TensorFlow which is used in Android app.
TBD
Report speed vs accuracy in mobile device.
Example app for Android
Aux loss
Some more optimizations??
NewFeelings
A smart album for Android which use tensorflow to classify images


visit history of project:Album-Category
tensorflow-classifier-android
TensorFlow (1.4.0) Image Classifier Gradle Standalone Port
Clone the project, and checkout the tag 1.4.0
Import it on Android Studio
Run it
That’s all.
This project is a way to get started with TensorFlow Image Classifier quickly.
I am not planning to maintain it. If you need an updated version, build it yourself using hints from this blog post.
Native libraries
Native compiled libraries are embedded in the 1.4.0 tag, so you won’t need to install the NDK.
However, this means that you cannot change the org.tensorflow.demo.env.ImageUtils class.
Here’s what you need to do if you want, for example, to use a different package name:
Install the NDK and build tools
Checkout the 1.4.0-cmake tag
Modify line 7 of the app/src/main/cpp/imageutils_jni.cpp file to specify your new package name
ck-tensorflow
Integration of TensorFlow to Collective Knowledge workflow framework to provide unified CK JSON API for AI (customized builds across diverse libraries and hardware, unified AI API, collaborative experiments, performance optimization and model/data set tuning): http://cKnowledge.org/ai
TFDroid
A simple demo for using Tensorflow models in Android apps https://omid.al/posts/2017-02-20-Tuto…
ID-Card_with_TensorFlow_Opencv_in_Android
tensorflow-style-transfer-android
Artistic Style Transfer in Android using TensorFlow
This repository supports the codelab for Artistic Style Transfer in Android using TensorFlow. It is based on code forked from the TensorFlow repository.
Paideia
Know more about your surroundings using Deep Learning http://alseambusher.github.io/Paideia
Paideia
Paideia aims at making lives easier for all of us by bringing knowldege that we need in day to day lives one step closer to all of us. This is an android app using which one can point their phone at quite literally anything and get information about it. For instance, when you want to know more about the fruit that is sitting beside you or when you just want to “learn” more about the stuff that is around you, Paideia helps you start off. Here is some of the info given by Paideia about random stuff that is around us:


Seriously, the kind of information we get through Paideia by observing normal things around us is amazing!
##What can it do?
Detects objects around us.
Has inbuilt Text-to-speech system that can read it out. This can greatly help people with who are specially abled.
Extracts useful and relevant information from Wikipedia and Wolfram Alpha.
Users can set preferences which allows Paideia to customize what they see.
##How does it do?
We use a deep learning model trained using Tensorflow on Imagenet ILSVRC2012 data to recognize images from live feed.
We use API’s provided by Wolfram Alpha and Wikipedia in order to extract relevant information to the user.
We use a simple learning approach to customize feeds for users based on their usage pattern.
Google tts system to read out information to the user.
##Who does it help?
Children who want to learn more.
Adults who want to learn more.
Specially abled people who want to learn more.
So basically, everyone who wanna learn more.
##Where can I get it? Grab the apk from release page.
##Setting up the codebase.
Setup Tensorflow.
Setup Bazel.
Clone the repo in the root folder of tensorflow.
$ git clone https://github.com/alseambusher/Paideia
Get model
$ wget https://storage.googleapis.com/download.tensorflow.org/models/inception5h.zip -O /tmp/inception5h.zip
$ unzip /tmp/inception5h.zip -d Paideia/assets/
Building code
$ bazel build //Paideia:paideia
Installation
$ adb install bazel-bin/Paideia/paideia.apk
##Contribiting Pull requests and suggestions are welcome.

tensorflow-hangul-recognition
Handwritten Korean Character Recognition with TensorFlow and Android https://developer.ibm.com/code/patter…
Handwritten Korean Character Recognition with TensorFlow and Android
Read this in other languages: 한국어.
Hangul, the Korean alphabet, has 19 consonant and 21 vowel letters. Combinations of these letters give a total of 11,172 possible Hangul syllables/characters. However, only a small subset of these are typically used.
This journey will cover the creation process of an Android application that will utilize a TensorFlow model trained to recognize Korean syllables. In this application, users will be able to draw a Korean syllable on their mobile device, and the application will attempt to infer what the character is by using the trained model. Furthermore, users will be able to form words or sentences in the application which they can then translate using the Watson Language Translator service.

The following steps will be covered:
Generating image data using free Hangul-supported fonts found online and elastic distortion.
Converting images to TFRecords format to be used for input and training of the model.
Training and saving the model.
Using the saved model in a simple Android application.
Connecting the Watson Language Translator service to translate the characters.
Flow
The user downloads several Korean fonts to use for data generation.
The images generated from the fonts are fed into a TensorFlow model for training.
The user draws a Korean character on their Android device.
The drawn character is recognized using the previously trained TensorFlow model and the Android TensorFlow Inference Interface.
A string of the classified Korean characters is sent to the Watson Language Translator service to retrieve an English translation.
With Watson
Want to take your Watson app to the next level? Looking to leverage Watson Brand assets? Join the With Watson program which provides exclusive brand, marketing, and tech resources to amplify and accelerate your Watson embedded commercial solution.
Included Components
Watson Language Translator: A Bluemix service that converts text input in one language into a destination language for the end user using background from domain-specific models.
TensorFlow: An open-source software library for Machine Intelligence.
Android: An open-source mobile operating system based on the Linux kernel.
Featured Technologies
Artificial Intelligence: Cognitive technologies that can understand, reason, learn, and interact like humans.
Mobile: An environment to develop apps and enable engagements that are designed specifically for mobile users.
Watch the Video
Steps
Follow these steps to setup and run this developer journey. The steps are described in detail below.
1 Install Prerequisites
2 Generate Image Data
3 Convert Images to TFRecords
4 Train the Model
5 Try Out the Model
6 Create the Android Application
- Install Prerequisites
Make sure you have the python requirements for this journey installed on your system. From the root of the repository, run:
pip install -r requirements.txt
Note: For Windows users, the scipy package is not installable via pip. The recommended way to use scipy is to install a scientific Python distribution. One of the more popular ones is Anaconda. However, you can also manually install the scipy package on Windows using one of the installers located here.
- Generate Image Data
In order to train a decent model, having copious amounts of data is necessary. However, getting a large enough dataset of actual handwritten Korean characters is challenging to find and cumbersome to create.
One way to deal with this data issue is to programmatically generate the data yourself, taking advantage of the abundance of Korean font files found online. So, that is exactly what we will be doing.
Provided in the tools directory of this repo is hangul-image-generator.py. This script will use fonts found in the fonts directory to create several images for each character provided in the given labels file. The default labels file is 2350-common-hangul.txt which contains 2350 frequent characters derived from the KS X 1001 encoding. Other label files are 256-common-hangul.txt and 512-common-hangul.txt. These were adapted from the top 6000 Korean words compiled by the National Institute of Korean Language listed here. If you don’t have a powerful machine to train on, using a smaller label set can help reduce the amount of model training time later on.
The fonts folder is currently empty, so before you can generate the Hangul dataset, you must first download several font files as described in the fonts directory README. For my dataset, I used around 40 different font files, but more can always be used to improve your dataset, especially if you get several uniquely stylized ones. Once your fonts directory is populated, then you can proceed with the actual image generation with hangul-image-generator.py.
Optional flags for this are:
–label-file for specifying a different label file (perhaps with less characters). Default is ./labels/2350-common-hangul.txt.
–font-dir for specifying a different fonts directory. Default is ./fonts.
–output-dir for specifying the output directory to store generated images. Default is ./image-data.
Now run it, specifying your chosen label file:
python ./tools/hangul-image-generator.py –label-file
Depending on how many labels and fonts there are, this script may take a while to complete. In order to bolster the dataset, three random elastic distortions are also performed on each generated character image. An example is shown below, with the original character displayed first, followed by the elastic distortions.
Normal Image Distorted Image 1 Distorted Image 2 Distorted Image 3
Once the script is done, the output directory will contain a hangul-images folder which will hold all the 64x64 JPEG images. The output directory will also contain a labels-map.csv file which will map all the image paths to their corresponding labels.
- Convert Images to TFRecords
The TensorFlow standard input format is TFRecords, which is a binary format that we can use to store raw image data and their labels in one place. In order to better feed in data to a TensorFlow model, let’s first create several TFRecords files from our images. A script is provided that will do this for us.
This script will first read in all the image and label data based on the labels-map.csv file that was generated above. Then it will partition the data so that we have a training set and also a testing set (15% testing, 85% training). By default, the training set will be saved into multiple files/shards (three) so as not to end up with one gigantic file, but this can be configured with a CLI argument, –num-shards-train, depending on your data set size.
Optional flags for this script are:
–image-label-csv for specifying the CSV file that maps image paths to labels. Default is ./image-data/labels-map.csv
–label-file for specifying the labels that correspond to your training set. This is used by the script to determine the number of classes. Default is ./labels/2350-common-hangul.txt.
–output-dir for specifying the output directory to store TFRecords files. Default is ./tfrecords-output.
–num-shards-train for specifying the number of shards to divide training set TFRecords into. Default is 3.
–num-shards-test for specifying the number of shards to divide testing set TFRecords into. Default is 1.
To run the script, you can simply do:
python ./tools/convert-to-tfrecords.py –label-file
Once this script has completed, you should have sharded TFRecords files in the output directory ./tfrecords-output.
$ ls ./tfrecords-output
test1.tfrecords train1.tfrecords train2.tfrecords train3.tfrecords
- Train the Model
Now that we have a lot of data, it is time to actually use it. In the root of the project is hangul_model.py. This script will handle creating an input pipeline for reading in TFRecords files and producing random batches of images and labels. Next, a convolutional neural network (CNN) is defined, and training is performed. The training process will continuously feed in batches of images and labels to the CNN to find the optimal weight and biases for correctly classifying each character. After training, the model is exported so that it can be used in our Android application.
The model here is similar to the MNIST model described on the TensorFlow website. A third convolutional layer is added to extract more features to help classify for the much greater number of classes.
Optional flags for this script are:
–label-file for specifying the labels that correspond to your training set. This is used by the script to determine the number of classes to classify for. Default is ./labels/2350-common-hangul.txt.
–tfrecords-dir for specifying the directory containing the TFRecords shards. Default is ./tfrecords-output.
–output-dir for specifying the output directory to store model checkpoints, graphs, and Protocol Buffer files. Default is ./saved-model.
–num-train-steps for specifying the number of training steps to perform. This should be increased with more data (or vice versa). The number of steps should cover several iterations over all of the training data (epochs). For example, if I had 320,000 images in my training set, one epoch would be 320000/100 = 3200 steps where 100 is the default batch size. So, if I wanted to train for 30 epochs, I would simply do 3200*30 = 96000 training steps. Definitely tune this parameter on your own to try and hit at least 15 epochs. Default is 30000 steps.
To run the training, simply do the following from the root of the project:
python ./hangul_model.py –label-file
Depending on how many images you have, this will likely take a long time to train (several hours to maybe even a day), especially if only training on a laptop. If you have access to GPUs, these will definitely help speed things up, and you should certainly install the TensorFlow version with GPU support (supported on Ubuntu and Windows only).
On my Windows desktop computer with an Nvidia GTX 1080 graphics card, training about 320,000 images with the script defaults took just a bit over two hours. Training on my MacBook Pro would probably take over 20 times that long.
One alternative is to use a reduced label set (i.e. 256 vs 2350 Hangul characters) which can reduce the computational complexity quite a bit.
As the script runs, you should hopefully see the printed training accuracies grow towards 1.0, and you should also see a respectable testing accuracy after the training. When the script completes, the exported model we should use will be saved, by default, as ./saved-model/optimized_hangul_tensorflow.pb. This is a Protocol Buffer file which represents a serialized version of our model with all the learned weights and biases. This specific one is optimized for inference-only usage.
- Try Out the Model
Before we jump into making an Android application with our newly saved model, let’s first try it out. Provided is a script that will load your model and use it for inference on a given image. Try it out on images of your own, or download some of the sample images below. Just make sure each image is 64x64 pixels with a black background and white character color.
Optional flags for this are:
–label-file for specifying a different label file. This is used to map indices in the one-hot label representations to actual characters. Default is ./labels/2350-common-hangul.txt.
–graph-file for specifying your saved model file. Default is ./saved-model/optimized_hangul_tensorflow.pb.
Run it like so:
python ./tools/classify-hangul.py
Sample Images:
Sample Image 1 Sample Image 2 Sample Image 3 Sample Image 4 Sample Image 5
After running the script, you should see the top five predictions and their corresponding scores. Hopefully the top prediction matches what your character actually is.
Note: If running this script on Windows, in order for the Korean characters to be displayed on the console, you must first change the active code page to support UTF-8. Just run:
chcp 65001
Then you must change the console font to be one that supports Korean text (like Batang, Dotum, or Gulim).
- Create the Android Application
With the saved model, a simple Android application can be created that will be able to classify handwritten Hangul that a user has drawn. A completed application has already been included in ./hangul-tensordroid.
Set up the project
The easiest way to try the app out yourself is to use Android Studio. This will take care of a lot of the Android dependencies right inside the IDE.
After downloading and installing Android Studio, perform the following steps:
Launch Android Studio
A Welcome to Android Studio window should appear, so here, click on Open an existing Android Studio project. If this window does not appear, then just go to File > Open… in the top menu.
In the file browser, navigate to and click on the ./hangul-tensordroid directory of this project, and then press OK.
After building and initializing, the project should now be usable from within Android Studio. When Gradle builds the project for the first time, you might find that there are some dependency issues, but these are easily resolvable in Android Studio by clicking on the error prompt links to install the dependencies.
In Android Studio, you can easily see the project structure from the side menu.

The java folder contains all the java source code for the app. Expanding this shows that we have just four java files:
MainActivity.java is the main launch point of the application and will handle the setup and button pressing logic.
PaintView.java is the class that enables the user to draw Korean characters in a BitMap on the screen.
HangulClassifier.java handles loading our pre-trained model and connecting it with the TensorFlow Inference Interface which we can use to pass in images for classification.
HangulTranslator.java interfaces with the Watson Language Translator API to get English translations for our text.
In it’s current state, the provided Android application uses the 2350-common-hangul.txt label files and already has a pre-trained model trained on about 320,000 images from 40 fonts. These are located in the assets folder of the project, ./hangul-tensordroid/app/src/main/assets/. If you want to switch out the model or labels file, simply place them in this directory. You must then specify the names of these files in MainActivity.java, ./hangul-tensordroid/app/src/main/java/ibm/tf/hangul/MainActivity.java, by simply changing the values of the constants LABEL_FILE and MODEL_FILE located at the top of the class.
If you want to enable translation support, you must do the following:
Create a Bluemix account here.
Create the Watson Language Translator service.
Get Translator service credentials. Credentials should have been automatically created. You can retrieve them by clicking on the Language Translator service under the Services section of your Bluemix dashboard.
Update ./hangul-tensordroid/app/src/main/res/values/translate_api.xml with the username and password retrieved in step 3.
Run the application
When you are ready to build and run the application, click on the green arrow button at the top of Android Studio.

This should prompt a window to Select Deployment Target. If you have an actual Android device, feel free to plug it into your computer using USB. More info can be found here. If you do not have an Android device, you can alternatively use an emulator. In the Select Deployment Target window, click on Create New Virtual Device. Then just follow the wizard, selecting a device definition and image (preferably an image with API level 21 or above). After the virtual device has been created, you can now select it when running the application.
After selecting a device, the application will automatically build, install, and then launch on the device.
Try drawing in the application to see how well the model recognizes your Hangul writing.
Links
Deep MNIST for Experts: Tutorial for creating and training a convolutional neural network to recognize handwritten digits.
TensorFlow Mobile: Information on TensorFlow mobile support on different platforms.
Hangul Syllables: List of all Hangul syllables.
ai-candy-dispenser
A Candy Dispenser using Android Things + TensorFlow
Android Things A.I. Candy Dispenser
The Android Things A.I Candy Dispenser it’s a demonstration of how to create a “smart” candy machine. The device have a game that ask the user for a specific thing like a Bird, Dog ou Cat and the user should show a photo of that thing in the predefined time to win candies.
This project uses a button to interact with the user, obtains images via a camera peripheral and a modified electric candy dispenser being controlled by a GPIO with a transistor.
When the user takes a picture, it processes the image data using Google’s Cloud Vision API, which returns annotations and metadata of the image. This info is used by the device to see if it matches what it requested. When we have a match, the motor of the candy machine is activated to give the user the prize.
All users interface is presented in a Serial i2C 20x4 Display.
Pre-requisites
Android Things compatible board
Android Things compatible camera (for example, the Raspberry Pi 3 camera module)
Android Studio 2.2+
“Google Repository” from the Android SDK Manager
Google Cloud project with Cloud Vision API enabled
The following individual components:
1 push button
1 resistor
1 electric candy machine
1 NPN transistor
1 diode
1 Serial i2c 20x4 Display
jumper wires
1 breadboard
Schematics
Setup and Build
To setup, follow these steps below.
Add a valid Google Cloud Vision API key in the constant ImageClassifierUtil.CLOUD_VISION_API_KEY
Create a Google Cloud Platform (GCP) project on GCP Console
Enable Cloud Vision API under Library
Add an API key under Credentials
Copy and paste the Cloud Vision API key to the constant in ImageClassifierUtil.kt
Running
To run the app module on an Android Things board:
Connect a push button to your device’s GPIO pin according to the schematics below
Deploy and run the app module
Reboot the Android Things board in order to grant the camera permission (this is a known issue with Developer Preview )
Press the button to start the game and see what it asks.
Search for a photo and press the button to take a picture for it.
Wait for the results, if it succeeds it will ask you to press the button to release the candies.
References
https://github.com/androidthings/doorbell
https://github.com/androidthings/sample-tensorflow-imageclassifier
TensorflowLite
Tensorflow Lite Android Library
RapidDraw
A simple artificial intelligence experiment to find out if mobile neural networks can recognize human-made doodles
RapidDraw
RapidDraw is a simple Artificial Intelligence experiment to check if a neural network running on Android can recognize what you are doodling. To make it more fun, there is an entire game wrapped around the neural network.
On each attempt, you’ll be given 1 chance to draw 8 different objects. The objects will be chosen randomly from over 100 objects.
Get it here : https://play.google.com/store/apps/details?id=io.aniruddh.rapiddraw
Building
Building this is pretty easy. Simply import the files in Android Studio and you are good to go.
Though there are somethings you have to do yourself :
Train the dataset : The retrained_graph.pb and retrained_labels.txt have not been provided in this source. So you’ll have to train the neural network yourself to get these files out. Refer to processing for details.
Contributing
Fork it
Make necessary changes
Make a pull request
I’ll merge it if it serves the purpose ;)
driverless-rccar
DRIVERLESS RC CAR
Because real cars are too expensive for self-driving car studies, we are building a self-driving RC car as a testbed. When you have
an RC car with a steering servo,
an Android device with WiFi, Camera and Bluetooth support (we use Samsung Galaxy S3 Mini),
a selfie stick,
a breadboard and many jumpers,
an Arduino (we have an Arduino UNO),
an HC-06 bluetooth module,
a powerful GPU at your disposal (we use GTX 1070)
you are good to go. We also have a speed sensor, but it is only for monitoring purposes, you don’t need it to train and drive your RC car.
Data Acquisition
While a human controlling the car through a transmitter, Arduino reads steering and speed commands, which are essentially servo signals, from the receiver. It also computes steering angles (just a linear mapping from steering commands to angles in degrees) and measures speed in m/s from the speed sensor. Arduino eventually sends them to the Android device installed on the car. We use bluetooth for the communication between Arduino and Android. Android device attaches a current image frame to the Arduino readings and forwards them all to a remote machine over TCP/IP. We capture 20 frames per second along with the Arduino readings. We had to create an access point on the remote machine to make the communication more reliable.
The figure below demostrates how the data acquisition works.
This is how our dataset looks like. The commands marked in red are the steering commands. We have speed commands (i.e. throttle) and image file names on the right and left of the red rectangle, respectively.

A row in dataset.txt is as follows:
timestep;timestamp;imagefile;steering_cmd;speed_cmd;steering;speed
Teaching a Machine to Steer a Car
You might have heard about Udacity’s open source self-driving car project. They organize various challenges to build the car step by step. Their steering control challenge led to brilliant deep learning models and we implemented the winner model by Team Komanda for our RC car. It has been a great starting point for our self-driving RC car journey. It should also be possible to experiment with other existing steering control models or develop and try out our own models using our RC car setup.
One difference between our training strategy and original Komanda model is that we augment our training set by vertically flipping images and mirroring their corresponding steering commands and angles with respect to the neutral position before training. We don’t use steering angles for training, they are used for monitoring purposes just like speed values in m/s. Another difference is the size of input images. Our images have a size of 176x144, which was the minimum possible image size from our Android device. The model tries to predict both steering and speed commands given the input images.
You can see the results in the following video.
Directory Structure
carino contains Arduino-specific code.
caroid contains Android-specific code.
station contains dataset acquisition code and our deep learning agent(s) on remote machine side. It also features various visualization tools.